Ever-Strong Deck™ Installation Guidelines
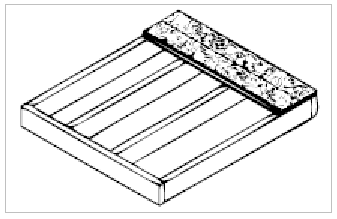
Ever Strong ™ is a wood grained PVC deck board with a water shedding design. The patented interlocking deck boards are designed to create a substantial deck surface and move water off the ends of the boards, not between them. When installed properly and with the limitations listed in these instructions, the Ever Strong ™ will provide years of service and significantly reduce the amount of water dripping onto the deck substructure. Proper installation of the deck boards and the preparation of your substructure are both very important factors in constructing a good deck and achieving the desired water shedding feature. When using the splice to extend the length or when butting boards together in any way other than with the interlocking chamber, the use of a sealant at the joint is required if water leakage is a concern. The deck boards are to be installed with a slight pitch to direct the water off the deck surface with the slope away from main structure. Care must also be considered when cutting openings in the deck board surface to install posts for the guard rail system. This guide is intended to address most new deck construction and retrofitting applications. The Ever Strong Deck™ is not intended to be installed as a roof. Proper construction and code compliant design of the deck substructure is not covered in this guide.
1) Prior to installation, consult your local Building Code Department to address applicable Building Codes, including those for the substructure, railing, and any attachments required.
2) The Ever Strong ™ is manufactured under a stringent quality control program, and when properly installed will give you years of enjoyment with low maintenance. The substructure, usually wood framing, is an important part of your proper installation. We Recommend 16” centers; however 24” joist centers can be used. See ESR -1657 www.icc-es.org.
3) The substructure must be constructed according to your local building codes. The substructure must be flat, in that the tops of the joists are all at the same level. If it has irregular high or low spots across the joists, they must be corrected in order to enhance water run-off, lessen water pooling and subsequent dripping.
4) The substructure will require a minimum slope, or drop of 1/8” per 8’ of decking surface in the long direction of the Gorilla Deck® G3 boards. The slope or drop of 1/8” per 8’ should be such that the water will be directed away from the building or structure that it is attached to. This will allow the deck to shed water adequately and reduce dripping of water.
5) Install the starter strip, using a 1-1/2 inch, #8 self-cutting stainless steel decking screw, at each joist. The screws are inserted in the hollow chamber of the starter strip.
6) Using a rubber mallet place the first precut deck board into the starter strip. The Ever Strong ™ may be cut with a fine-toothed carbide saw, such as a skill or table saw.
7) Secure the Deck Board using a 1-1/2 inch, #8 self-cutting stainless steel decking screw, at each joist. The screws are inserted in to the back edge of the deck board, not the hollow interlocking chamber.
8) Continue using the same method with the next deck board, interlocking the deck boards together and attaching them with screws until the deck surface is covered.
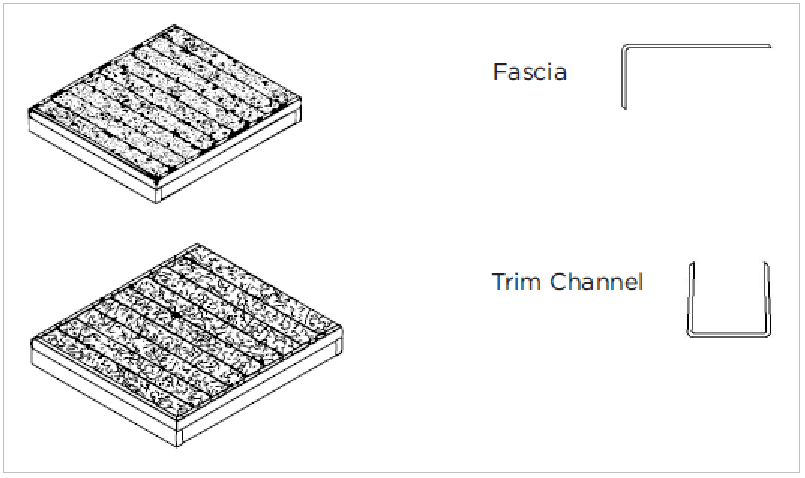
9) Finish out the deck with fascia or finish trim. Securing with #6 pan head stainless steel screws.
10) Install vinyl flashing, found at most hardware stores, from the edge of the deck to the building structure. Seal the edges along the building and on the edge attached to the deck board using a caulking gun with a high quality marine silicone sealant. This will prevent water from running onto your substructure between the deck and the building.
11) If you have wooden 4” x 4” wooden post that will protrude through the deck for guardrail installation: Carefully cut the openings in the deck to allow use of a high quality marine silicone sealant. Seal the edges of the deck board and the post using a caulking gun with a high quality marine silicone sealant. Be sure to completely fill the end of the interlocking chamber. This will reduce the amount of water running down the post onto your substructure area below.
12) If you choose to install the deck boards at an angle, or have a longer span than the length of your deck boards, the splice is utilized. The splice is installed onto a double joist substructure, using a 1-1/2 inch, #8 self-cutting stainless steel decking screw, at each joist. Careful attention to the cutting and sealing of the deck boards to the splice is very important. Again, apply a high quality marine silicone sealant with a caulking gun on both the lower and upper deck surfaces. This will reduce the water dripping onto your substructure.
Tools Required:
(1): Power Drill with Deck Screw Driver
(2): Safety Glasses
(3): Pencil
(4): Square
(5): 6’ or Longer Level
(6): Multi Tooth Carbide Blade Power Saw
(7): Tape Measure
(8): Jig Saw for Cutting the Deck Boards for Posts
(9): Caulking Gun for the Silicone Sealant The examples and instructions in this document are for illustration purposes only. Any construction or use of these products must be in accordance with all local building codes. The consumer or contractor assumes all risks and liability associated with the fabrication or installation of these products. This includes and is not limited to improper installation, misuse, neglect, accidents, improper handling or alterations to these products.
No One Does it Better, when it Comes to Quality, Service and Price.
